How to Adjust RV Awning for Rain? – Pro Tips
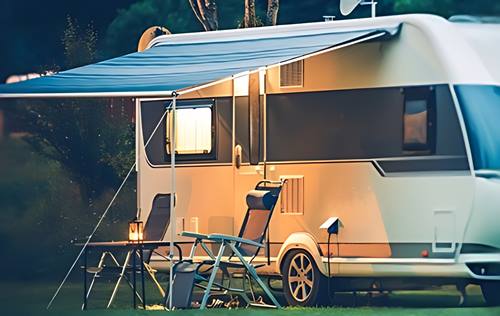
We were having a nice Sunday at our usual camping area by a beautiful lake in the woods. The sun had been blazing all day, keeping us warm and content inside our trusted RV. But then, out of nowhere, something unexpected happened.
As we were inside, playing games and enjoying the breeze from the open windows, we heard a distant thunder. We were both excited and nervous. Rain was on its way, and we knew we had to act quickly. We’d been on a lot of RV trips before, but we weren’t experts when it came to dealing with rain and our RV awning.
We dashed outdoors as the first raindrops fell to decide what to do. We had no idea that this unexpected rain would teach us a lot about how to manage our RV awning in the rain. In this blog, I’ll tell you about our rainy surprise and what we learned, so you can be prepared for rainy days on your own RV excursions. Let’s have a look at RV awnings and see how we can adjust RV awnings for rain!
How to Adjust the RV Awning for Rain?
I’m having difficulty with the awnings. They appear to be stuck, and the pins will not allow them to move. I’m at a loss because the dealer didn’t show me how to do it during the demo. The plastic parts also fell out. What am I doing incorrectly?
Sounds familiar? Well, here’s the answer.
I’ve discovered two facts regarding these awnings.
- First and foremost, do not leave them out in the rain or wind because they can easily bend.
- Second, to change the pitch, simply pull the short piece on one of the arms down.
Let me tell you more about it. It was difficult to adjust the awning pitch. I had to climb a ladder and work the tabs hard while tugging on the awning arm. Finally, I set all four to the lowest pitch setting, and they’ve stayed that way. No more alterations!
You know what? I’ve also learned not to keep them outside in inclement weather, and to change the pitch, simply pull the short arm piece down. It was difficult, but I finally got them to the lowest pitch, and they stayed in place.
Do You Have an Electric Awning or a Manual?
I’ve discussed the electric awnings with individuals at the campground. Many people are dissatisfied with electric awnings since they cannot adjust them like manual ones. Most people who have electric awnings tie them down, but it hasn’t posed any problems, except for the desire for de-flappers.
I experimented with tying mine, and it worked wonderfully. Yes, electric awnings can be fragile. We only extend ours when we need to, which is usually when it rains. Instead of relying on the awning’s shade in the hot afternoon sun, choose sites with the trailer facing north for natural shade.
How to Find Instructions for RV Awnings?
The documentation for our awnings arrived in the GD envelope. It included directions for adjusting the awning. Check the Serial Number Data Sheet that came with your unit if you can’t find it. The user manual can be downloaded from the manufacturer’s website.
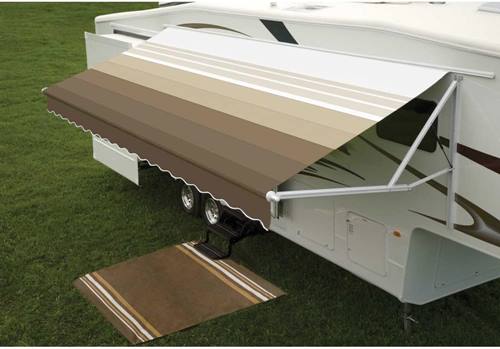
NOTE: Most new awnings adjust by inserting spring-loaded pins on the support arms and moving them to the next set of holes if you wish to do it yourself. Consider utilizing a pool noodle or foam pipe insulation method to improve safety before lowering it again.
Some Methods for RV Awning Adjustments
I examined the papers and discovered the manufacturer and part number. I immediately went to their website, but there was no mention of adjusting the pitch. So, what did I do?
I’ve rolled it out and opted to leave it alone for the time being. It’s a little worrisome because the awning appears to be pitched incorrectly, which could enable water to flow back toward the trailer rather than onto the ground. I tried to go over the pinholes to see if I could easily lower them a notch or two.
On the other hand, I made a rookie mistake at Wawa by exchanging one of my new propane tanks for an old one. So far, I haven’t had any problems with the ones I’ve been replacing. What exactly did I do?
Try these methods as well:
- You can insert two locking pins into one arm and choose a different location from the six available holes to change the tilt. Then repeat on the other side. It is critical that the disparity between the two sides not exceed three positions.
- For smaller awnings (12′ or less), the variation should be limited to one or two locations; however, mine is 16′. I can comfortably roll it in and out of this pitch! Now, how can you do it?
- You can easily modify your awning if it is like mine. To begin, loosen the knob that secures the awning on the side you want to lower. Then, pull down the arm until the knob is locked. Adjust the height to your liking. Tighten the knob again while holding the arm down. Your awning should now be at the desired level.
- Start by loosening one side, then tilt it by hand, and lastly, tighten it securely. You can also use spikes, ropes, and bungee cords to secure the awning’s two ends. This keeps it from flapping and making noise at night. The bungee cord allows for some movement without producing any loud clunks or pops.
NOTE: I always leave the knob loose since I believe it should slide when opening or shutting the awning. I pull the awning down and tighten the knob when I need to lower one or both ends.
HINT: Here’s a hint for people like me who take a little longer to figure things out. A step stool is not required while installing awning lights. Simply lower both awning ends. That one took me three trips to figure out.
What makes a power awning special? I, too, have a power awning. It has a long slot and a support bar that extends from the trailer to the end of the awning. The support bar’s one end slots into the other, and there’s a knob to tighten it.
Here’s information about a power awning.
The A & E (Dometic) power Awnings did not have adjustable arms when they were first launched. Their previous 5th wheel (08 model, built-in 07) also lacked these. Dometic issued a free retro-fit arm kit to RV owners in 2009, upon request. I don’t know if these kits are still available, but your Keystone dealer may know.
On their 2012 HC 5er, they also have an electric awning with locking arms and shocks. During my walkthrough, I was instructed that I could either manually tilt the awning and tighten the knobs or leave them loose in case of rain because the awning would automatically adapt to prevent pooling damage.
Conclusion
In short, adjusting your RV awning for rain is critical to protecting your investment and enjoying worry-free camping experiences. By following the advice provided here, you can ensure a more pleasant and trouble-free experience when the rain begins to pour. Have a great time camping!
Also Read: Should I Disconnect My RV Battery When Plugged In